This article will be a mini guide on training Yolov8 on your PC :solevoi: People with weak video cards or AMD cards, the guide is unfortunately not for you. I will also provide at the end the result of how I was able to train a neural network to identify reviews not issued under 3.15
Anaconda is a distribution of Python and R programming languages for scientific computing (data science, machine learning applications, large-scale data processing, predictive analytics, etc.), aimed at simplifying package management and deployment. The distribution includes data-science packages suitable for Windows, Linux, and macOS.
GO to the https://developer.nvidia.com/cuda-toolkit
GO to the https://developer.nvidia.com/rdp/cudnn-archive
We must to response the version
We have installed everything we need, now we smoothly move on to training the neural network. Let's start by creating a space for Anaconda
Open the Anaconda console and write there conda create -n lzt python=3.10.6 anaconda. This way we will create an environment for all this.
Open Anaconda and create image

We write conda activate lzt and now we are sitting under this environment
Installing PyTorch with GPU support for our anaconda
Go to https://pytorch.org/
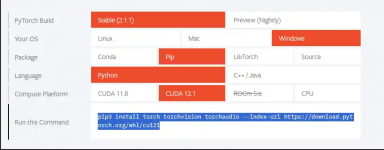
We were given a similar command that we need to insert into Anaconda:
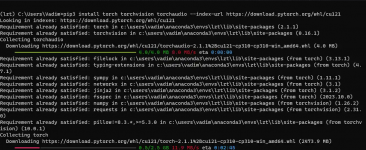
If after installation you have torch cuda is available = True then you did everything correctly

We have installed everything we need for work, now our main goal is to create a dataset, and then feed it for training.
Go to the site https://app.roboflow.com/ and register, if you have not done so before. I have been using this site for a long time, with its help you can create datasets as conveniently as possible range:
After registration, we need to create a project
After the project has been created, it is necessary to upload the images, and then for each one, using a special tool, select the object for which we will train our neural network.
We download the dataset from the site and based on it we will proceed to training the neural network
We prepare the file train.py with which we will launch the training

run train
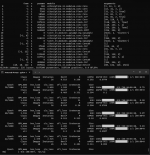
The end
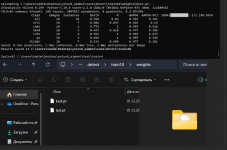
Then you can retrain this model whenever you want. You need to add resume=True in the train.py file and specify our model.

Where to start? With installing Anaconda.
Anaconda is a distribution of Python and R programming languages for scientific computing (data science, machine learning applications, large-scale data processing, predictive analytics, etc.), aimed at simplifying package management and deployment. The distribution includes data-science packages suitable for Windows, Linux, and macOS.
Follow the link https://www.anaconda.com/ and click Free Download
Video installation guide for anaconda.
After installing Anaconda, we need to install Microsoft C++ Build tools, CUDA, cuDNN
You can install Microsoft C++ Build Tools here - https://visualstudio.microsoft.com/ru/visual-cpp-build-tools/
When installing, do not forget to check the box on C++ build tools
GO to the https://developer.nvidia.com/cuda-toolkit
Download CUDA and install(Express option)
GO to the https://developer.nvidia.com/rdp/cudnn-archive
Download cuDNN
install
Open the archive and drag bin, include, lib>x64 from it into the folder with CUDA.
Setting up system environments
all steps for install CUDA and on the end system environments
Open the cmd.exe console and write nvcc --version in itinstall
Open the archive and drag bin, include, lib>x64 from it into the folder with CUDA.
Setting up system environments
all steps for install CUDA and on the end system environments
We must to response the version
We have installed everything we need, now we smoothly move on to training the neural network. Let's start by creating a space for Anaconda
Open the Anaconda console and write there conda create -n lzt python=3.10.6 anaconda. This way we will create an environment for all this.
Open Anaconda and create image

press "y" at this stage.
We are waiting for all packages to be installed.We write conda activate lzt and now we are sitting under this environment
Installing PyTorch with GPU support for our anaconda
Go to https://pytorch.org/
We were given a similar command that we need to insert into Anaconda:
pip3 install torch torchvision torchaudio --index-url https://download.pytorch.org/whl/cu121

If after installation you have torch cuda is available = True then you did everything correctly

После всех проделанных действий устанавливаем Ultralytics для работы yolov8
Установка библиотекиpip install ultralytics
We have installed everything we need for work, now our main goal is to create a dataset, and then feed it for training.
Go to the site https://app.roboflow.com/ and register, if you have not done so before. I have been using this site for a long time, with its help you can create datasets as conveniently as possible
After registration, we need to create a project
After the project has been created, it is necessary to upload the images, and then for each one, using a special tool, select the object for which we will train our neural network.
We download the dataset from the site and based on it we will proceed to training the neural network
We prepare the file train.py with which we will launch the training
Create file train.py
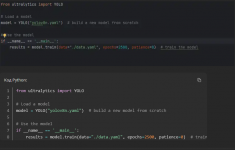
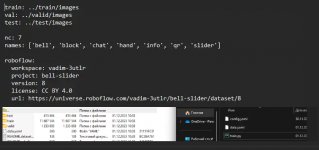
Push data.yaml from zip to the directory with train.py
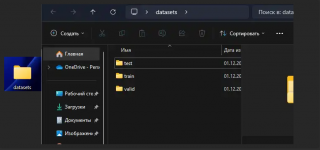
Push dataset to Desktop
We start training the neural network
Specify the path to the folder with the train.py file for Anaconda
Push data.yaml from zip to the directory with train.py

Push dataset to Desktop

We start training the neural network
run train
python train.py

The end

Then you can retrain this model whenever you want. You need to add resume=True in the train.py file and specify our model.


